Fall Leaves: Beeswax Dipped Leaves {Simple DIY}
Disclosure: This post contains affiliate links and I may receive a commission if you visit a link and purchase something from an ad or sponsored link shared. Purchasing via an affiliate link does not cost you any extra. As an Amazon Associate, I earn from qualifying purchases. Please see our full disclosure if you’d like more information. The Art Kit is a participant in the Target Affiliate Marketing Program, an affiliate advertising and marketing program that pays commissions to affiliates, like me, that advertise and link to Target if you buy products from Target through my link.

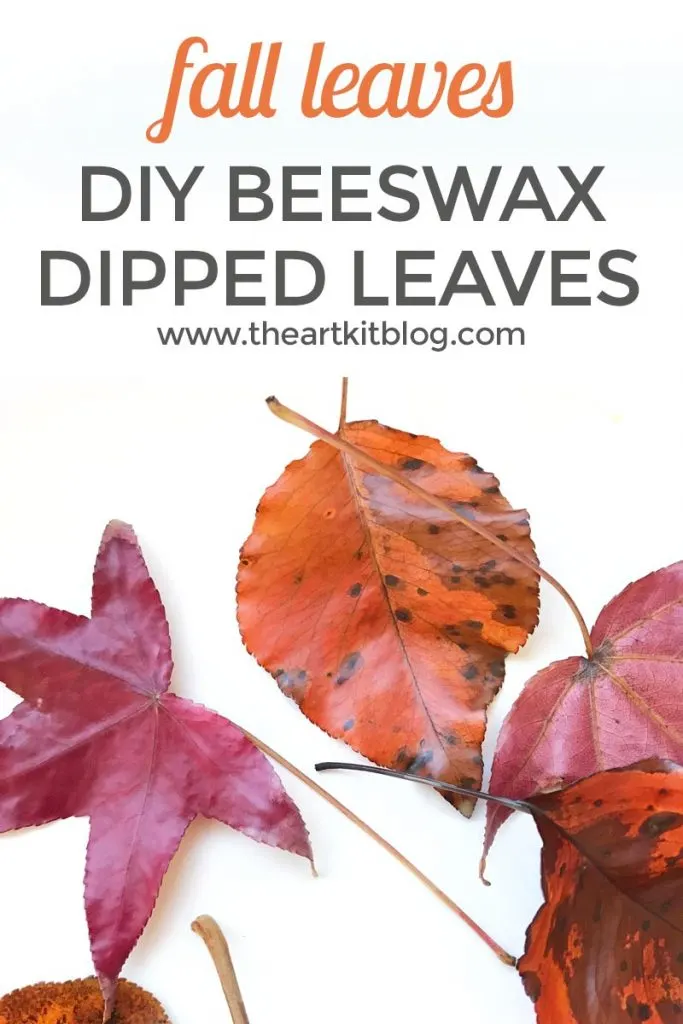
We have been enjoying all the beautiful fall leaves lately and wanted to preserve them so we could enjoy them throughout the season and next. We discovered a simple way to do so and are excited to share this simple DIY with you! To learn how to preserve fall leaves with beeswax, please continue reading below.

Preserve Your Leaves with Beeswax
Step 1. Begin by going on a nature walk and collecting all the beautiful red, orange, and yellow fall leaves you can find. We selected the slightly dried-out but not so crunchy leaves.
Step 2. Melt your beeswax. We have a dedicated container that we use only for melting beeswax and would recommend you do the same. To melt your beeswax, place your container over a pot of boiling water, place your beeswax in, and allow it to melt. Keep the heat low – it won’t take long to melt the wax but you don’t want to rush the process.

This is a good test of patience. 😉 While you wait for the wax to melt, take a few breaths in and enjoy the sweet smell of melting beeswax. Trust me on this – it smells soooo good!

Another fall craft you may enjoy is this fall leaf butterfly craft from a fellow blogger.
Step 3. Once the beeswax has melted, you can lower your heat even more.
Beeswax Melting Tip: The wax doesn’t need to be too deep (not more than a couple inches) as you can lay the leaves down in the beeswax as you dip them. Of course, more beeswax in your container is perfectly fine too!
Step 4: Pick up your first leaf (Miss 2 enjoyed handing me the leaves for this activity) using a pair of tongs. I used something similar to these olive wood toast tongs.

Step 5: After you’ve dipped a leaf, allow the beeswax to drip off it, and then place it on a sheet of parchment paper to cool.

Once cool, display your leaves around your home. You could string them and make a garland, attach them to the wall by using clothespins, or place them in a wooden bowl for display.
The leaves feel so good to the touch, smell amazing, and look beautiful in the sunlight. Beeswax-coated leaves are a must-do activity and it’s truly so simple to make.

Beeswax coated leaves would also make a fantastic addition to your child’s nature table, along with a magnifying glass, and perhaps a book on leaves.
If you have younger children that you are concerned may try to eat or tear the leaves (tearing one or two leaves may be part of their exploring process and is fine but you probably wouldn’t want them tearing up all the leaves), you could place a leaf or two inside these blocks. Your children can still enjoy looking at their nature finds but you wouldn’t have to worry about them ingesting anything when you aren’t watching. 🙂
To see more book suggestions that would pair well with this fall activity, please see our Fall Morning Basket favorites here.
If you enjoyed this post, please share it on social media. Or, pin this to save it.

What else would you like to see from The Art Kit? Let us know in the comment section below.
Follow us on Facebook, Pinterest, Instagram, and Twitter, and please sign up for our newsletter to receive updates and FREE printables.
Want more? Be sure to check out some of our other fun activities:
- Week 1 – The Playful Pioneers
- Ladybug cutting and pasting craft (with free printable)
- Apple counting playdough mats {free printable}
- DIY alphabet rocks
- Salt tray – writing practice {free printables!}


❤️🔥 Click here for today’s HOT deals!
💌 Follow us on Amazon, Facebook, YouTube, Pinterest, Instagram, and Twitter, and please sign up for our newsletter to receive updates and FREE printables.
💵 Check out our coupon page – we have coupon codes for dozens of shops!
Visit our printable shop for even more fun printables!
If you enjoyed this post, please share it on social media. Or, pin this to save it.


Jennifer
Monday 14th of October 2019
Hello! I tried to follow the link for the blocks you recommended to make exploration safer for young toddlers/babies but it didn't work. Would you please describe the blocks or post another link? Thanks!
The Art Kit
Tuesday 15th of October 2019
Hi! Yes, they are wood blocks made by Guidecraft with a clear middle area so that you can see through to the inside. Here's another link here. Hopefully this one works!