
Best Ever No-Cook Playdough Recipe You Can Make in a Stand Mixer!
Best Ever No-Cook Playdough Recipe You Can Make in a Stand Mixer!
Disclosure: This post contains affiliate links, which means I may earn a commission if you make a purchase through one of my links, at no additional cost to you. As an Amazon Associate, I earn from qualifying purchases. Please see our full disclosure for more information. The Art Kit participates in the Target Affiliate Marketing Program and Walmart’s affiliate program and may earn commissions from qualifying purchases made through our links. Please note: Always use appropriate supervision and use caution with small pieces. Be sure products and activities are appropriate for your child’s age and skill level.
Today we're sharing our best ever, no-cook playdough recipe that you can make in a stand mixer. It doesn't get any easier than this! Read on to discover the all-time best playdough recipe that has stood the test of time. It's perfectly smooth, not the least bit sticky, and so easy to make.

There is nothing better than a freshly made batch (or two!) of homemade playdough. For years we made our one-pot playdough on the stove. But it was a lot of work mixing it by hand!
Today, we're sharing our time-saving no-cook playdough recipe. We love playdough for so many reasons- the endless opportunities for creative play and learning, the sensory aspect, and the excitement on the faces of our little ones when we tell them we're whipping up a new batch.
Not sure what to do with playdough? No worries! We will be sure to share a few of our favorite play ideas at the bottom of this post. But first, read on below to see how we make our famous homemade no-cook playdough.

Begin by adding the following ingredients to your stand mixer:
- 11 ounces (about 2 cups) of flour
- 2 tablespoons of cream of tartar (we often buy it in bulk- this is the one we purchase)
- ¼ cup salt
- 2 tablespoons of oil
- Several drops of food coloring into a glass or metal measuring cup + 1 cup of boiling water (we heat our water in an electric kettle).
Once all the ingredients have been added to the mixing bowl, turn the mixer on low speed until the flour is incorporated (about 10-20 seconds).
Then, increase the speed to low-medium and allow to mix for an additional two minutes or so. If the dough is still sticky, add a bit more flour and mix until incorporated.
Then, remove it from the mixer and enjoy!
We also included a video + printable recipe card of how to make our best-ever no-cook playdough, please see below!


Isn't it just lovely? There is nothing like warm, homemade playdough. No artificial ingredients. So soft and smooth. Add in a few drops of essential oils and you've just put the icing on the cake!
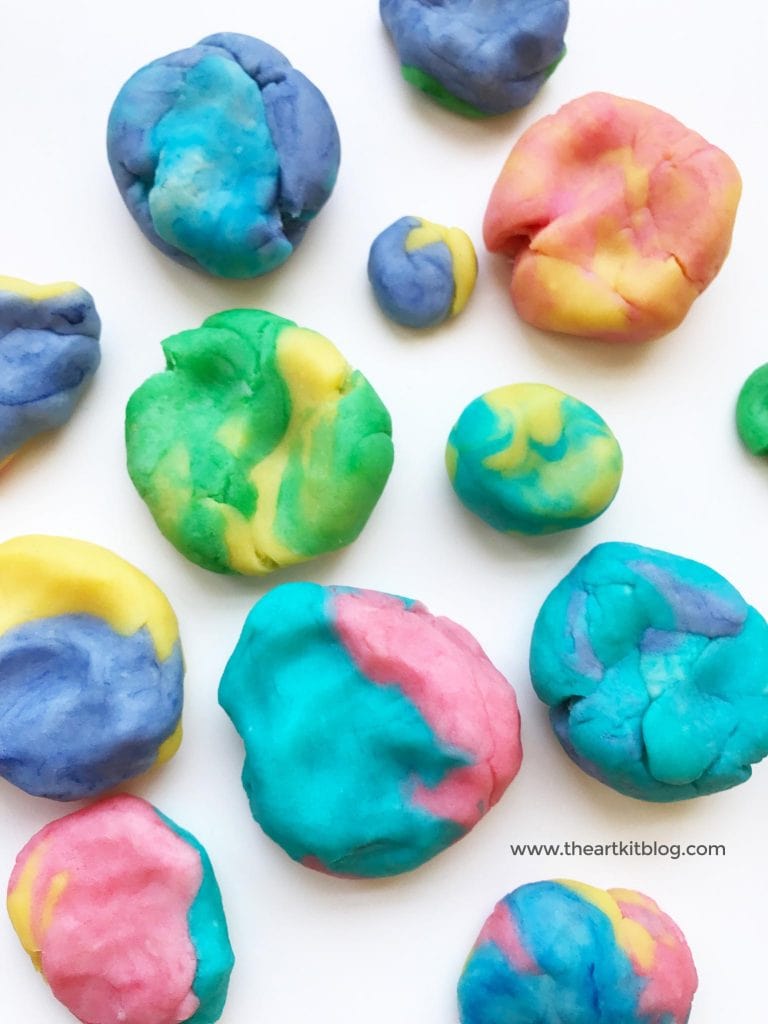
I often make several batches of different colored playdough at a time and never wash the bowl between batches. Just remove as much playdough as you can between batches and you'll be fine. I typically start with the lighter colors and then make the darker colors but I've made a dark brown batch and then a white batch and it came out completely white - you'd never know I had just made brown playdough seconds before.
Want a super simple playdough activity that will keep the kids entertained for hours? Pair a couple batches of this playdough along with their favorite set of Toobs and a playdough tool set. Place everything out on a plastic tray to keep it all contained and sit back and relax. 😉

Enjoy Watching our Playdough Tutorial Below:
Please like and subscribe to our YouTube channel here.
Want more? Check out our other homemade playdough recipes:
- Lemon
- Orange
- Lavender
- Apple pie
- Watermelon playdough activity
- Arctic-themed playdough activity
- Into the clouds playdough invitation
Please share this post on social media! Or, pin for later.
Follow us on Facebook, Pinterest, Instagram, and Twitter for updates, and sign up for our newsletter.
Don't Forget to Download Our FREE PRINTABLE Playdough Recipe Card

You'll Also Love These Related Playdough Recipes + Activities


WANT MORE OF THE GOOD STUFF?
Get my favorite finds, helpful resources, freebies, honest reviews, and deals worth knowing about—straight to your inbox.
Love finding a really good deal? Visit Deals + Finds for things I’d actually buy, recommend, or text a friend about.
And if you’d like to keep up with The Art Kit, you can also find me on Facebook, Instagram, Pinterest, TikTok, and YouTube.
Found this post helpful? Share it with a friend or pin it for later. ♡
💵 Check out our coupon page - we have coupon codes for many shops!

I have never made it, but this recipe looks very easy. I have to say, though, there is something about the smell of purchased playdough that makes me feel like a kid again.
I have bought play-doh and have made it at home. Probably bought it more then not. My last 5 at home really enjoy playdoh so i will probably try your recipe soon!
I usually buy store bought 🙂
This recipe and method looks great! We have made homemade and bought, but usually we buy play-doh.
Honestly we have not used any in awhile because they got all dried up. So this would be cool to try. Ive never done a homemade recipe before!
I’ve always had a NO play doh rule for the house so I never bought any. A few months ago my son got some for his birthday and was really happy. So I set him outside with a table and chair and he had a great time. But this spring has been really rainy. He was dying to play with it when it was cold and windy and rainy outside so I let him play in the laundry room since there’s no flooring in there. It has to stay contained tho or no more! I have also not been a fan of the chemicals in the store bought stuff and I’ve been thinking of making my own! Actually excited now to make this!