Make Gorgeous Easter Eggs the Easy Way - with Egg Wraps
Make Gorgeous Easter Eggs the Easy Way - with Egg Wraps
Disclosure: This post contains affiliate links, which means I may earn a commission if you make a purchase through one of my links, at no additional cost to you. As an Amazon Associate, I earn from qualifying purchases. Please see our full disclosure for more information. The Art Kit participates in the Target Affiliate Marketing Program and Walmart’s affiliate program and may earn commissions from qualifying purchases made through our links. Please note: Always use appropriate supervision and use caution with small pieces. Be sure products and activities are appropriate for your child’s age and skill level.
I know I say this a lot but I am so excited to share our latest craft with you today!! We made the most gorgeous Easter eggs today that you are going to LOVE! It took just minutes and was not messy in the slightest. Trust me on this - this easy DIY is a must-do this Easter season!
Please continue reading below to see how we made stunning wooden Easter eggs using egg wraps.
Check out all these fun Easter finds!

We purchased a set of egg wraps from Shining Light Dolls but you can purchase any egg wrap set you'd like. We found a lot of other gorgeous sets here. We personally love the egg wraps from Shining Light Dolls and are glad we started with those but we had so much fun decorating Easter eggs with them that we just might have to make a few more now that we've discovered so many other gorgeous sets.
How to Decorate Wooden Easter Eggs Using Egg Wraps
- Purchase a set (or two) of wooden eggs.
- Put egg wraps on the eggs (the children loved doing this part!), place one egg at a time on a slotted spoon, and carefully place it in a pot of boiling water for three seconds.
- Take the egg out and place it on a towel.
- After you've made all your eggs, dry them with a towel.
- You can simply leave them out for your children to enjoy or you could add a ribbon to the top of them and hang them from doorknobs for decoration.


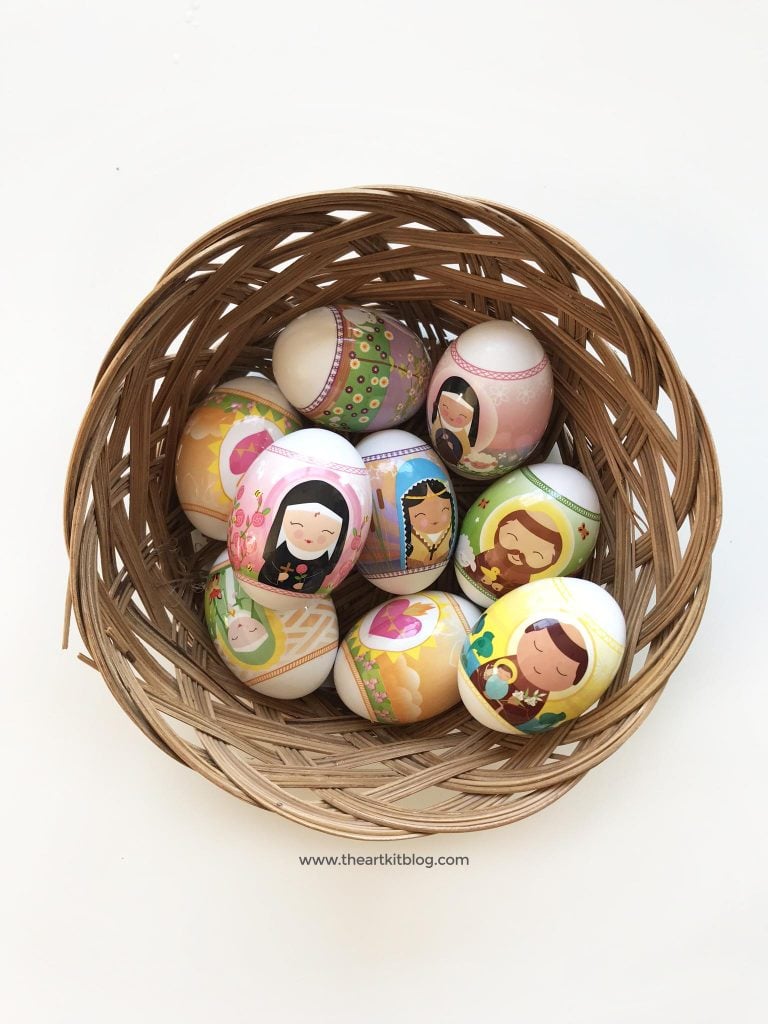

The children loved making these eggs (I put them in the boiling water, of course) and have loved playing with them. These wooden Easter eggs would also look beautiful tucked into an Easter basket.

They even matched our Shining Light dolls - the children were so excited to pair up their eggs with their dolls. If you haven't taken a look at Shining Light Dolls, you must! They have all sorts of amazing products, including:
- Saint dolls
- Keychains
- Mary garden seed packets
- Stickers
- Books
- And more!
- We love everything we have purchased from this amazing company.
If you enjoyed this post, please share it on social media. Or, pin this to save it.

What else would you like to see from The Art Kit? Let us know in the comment section below.
Follow us on Facebook, Pinterest, Instagram, and Twitter, and please sign up for our newsletter to receive updates and FREE printables.
Want more? Be sure to check out some of our fun spring activities.
- Bunny paper craft for kids - FREE Printables
- Free Easter Printables for Number Practice
- Easter Egg Color Sorting Activity Sheet - Free Printable
- Carrot Letters for Salt Letter Writing - FREE Printable Pack
- Painting Cardboard Carrots - Book Craft
WANT MORE OF THE GOOD STUFF?
Get my favorite finds, helpful resources, freebies, honest reviews, and deals worth knowing about—straight to your inbox.
Love finding a really good deal? Visit Deals + Finds for things I’d actually buy, recommend, or text a friend about.
And if you’d like to keep up with The Art Kit, you can also find me on Facebook, Instagram, Pinterest, TikTok, and YouTube.
Found this post helpful? Share it with a friend or pin it for later. ♡
💵 Check out our coupon page - we have coupon codes for many shops!